


Cascade Retractable Banner Stand Video Review
For more details, please visit our Cascade Banner Stand product page here.
Transcription:
Hello, and welcome to Trade Show Joe Video Series. I'm Dan Riley, and today we're going to take a look at a really great, slick new design for a retractable banner stand called the Cascade. Lets' have a look!
So, this is our Cascade Banner Stand: an all-aluminum construction. It comes in a variety of different sizes. You can get this particular model in a 24" width, 36" width, 48" width, and 60" width. The standard height on one of these units is going to be 8' or 96" high. We do have a couple tricks of the trade to be able to adjust the height. Lets’ have a look.
The unit is made almost entirely of a durable aluminum, so it's lightweight but strong. It has a roller mechanism, which is spring-loaded, inside the unit. The unit makes it easy for graphic to be exchanged from one to the other as needed. It has little adjustable feet, which can screw in or screw out of the base allowing (if you are on an uneven surface or table) to adjust that. I say on a table for the fact that these can be cut down and can be used for a table top application. If you have a smaller show where that makes the most sense, we can do that. We adjust the height of the pole and we account for the fact that you've got a shorter graphic to work with, so instead of a 96" graphic, we may do a 48" graphic. Other than that, it's the same. We even have customers that will use it for both. They'll have a pole for the short and a pole for the long. They adapt their graphic so that half of the graphic will convey a message, or fully extended it has more of a message so you can adjust it up or down as needed for a floor standing or table top application. The graphics themselves are printed using a variety of different printing processes depending on the print media. These can be done, most commonly, in vinyl. That would be a more economical solution, but if you want a little bit more and probably something that is a little nicer looking, you can do these as a dye-sublimation fabric. The graphic works a lot like a window blind. A window blind would be like this, where you pull down and it would lock into place. We obviously flip that or invert that and pull the graphic outward to the predetermined height, which is dictated by the length of the pole. The unit is field repairable. If there is a problem and part of this particular unit breaks (let's say that you break one of the side components or you lose one of the feet), for the most part we have the ability to be able to outfit the parts needed to be able to fix this, and there's no special skills or tools required. Most of this actually goes together fairly simply. I will now show you and demonstrate how this particular unit looks in its normal configuration, and we'll go from there.
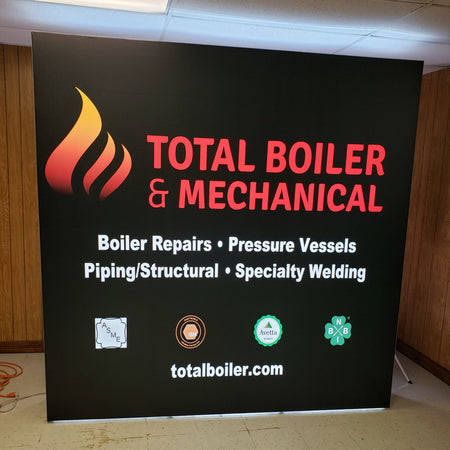
So, there are 4 components that make up the Cascade Banner Stand. We've got the base, we've got the graphic, we've got the pole, and we've got a bag. The pole is what stands the graphic upright and it is bungeed together in the bottom configuration, and the top portion of it (to allow for some versatility) is actually a twist and lock variety and is telescopic, so you've got the ability to adjust the height in and out of the pole. The standard fully extended height is 96", which is about as tall as it is in this room. If we had to or if we were asked to, the pole could be modified in the fact that it could be cut down to a smaller length so that it could be a shorter height and more of a table top style banner stand. So, this is basically how it goes together. You simply have an opening in the base that accepts the pole, and it goes in like so, or I'll show you a little trick. Sometimes, this works better if you can't quit reach up. I can normally handle reaching up the full height and getting it on there, but others are challenged with that, so what you can do is pull the graphic up. There is a little insert label that clues you in on how the pole goes. You simple are going to insert that there. That is what holds it into place, and you are going to use the pole to raise the graphic into a vertical orientation. Then, go ahead and let the pole recede into the base mechanism. This particular graphic is fabric and, as I pointed out, you would have the option of doing your graphic on either a full-color, beautiful, dye-sublimation fabric, or if you wanted to you could also go with a little more economical version that would just be printed in full color (still nice quality) onto a vinyl media.
The unit offers a lot of bang for the buck. We have people that will link these together, meaning if you have one large dynamic presentation (lets' say this particular image that looks like it is somewhere out in the Grand Canyon), they would be able to be linked side-by-side so that you could create a larger presentation. It looks pretty good if you design it correctly to be able to span the entire surface area across 3 banner stands. If you were to do that and push them flush together, you could have a 9' wide display that could take the place of some of the tension fabric displays or traditional popups.
So, this is our Cascade Banner Stand. It's something new to Trade Show Joe. It is something we are excited about that we feel offers good quality at a good price. You're welcome to check out our Cascade as well as other banner stands and trade show products by visiting TradeShowJoe.com, and while there feel free to chat with us, to contact us via our toll-free number, or to email us at any time. We look forward to hearing from you!


Comments